Tripod Repairs
I've been using a cheap and nasty tripod for a very long time, it's a bit broken and rickety but it's functional so I haven't felt the need to replace it. Now that I have a functioning 3D printer though it was a good exercise to create the parts needed to fix it.
First up were the rubber feet, one of these disappeared early on, the new one is made from PLA and isn't as grippy but at least it's not a bare metal end with a chance of scratching the worktops. I was lucky enough to model the odd shaped hole in a way that just about gripped the metalwork, not too tight or too lose. I applied a few spots of superglue to them all to ensure that none of them get lost again.
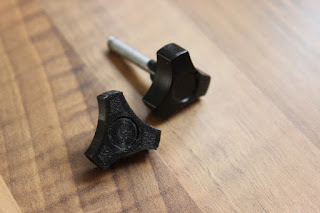
Next up, one of the knobs was cracked. It was still holding together but it spirals apart when you turn it in one direction. Getting the curves on this part was a good exercise, I simply left the hole in the middle at 4.5mm wide and used an M5 tap to thread it. I removed the M5 threaded rod from the old part, inserted it into the new one (again with a spot of glue) and fitted it to the tripod.
Finally I fixed the handle, I used a slightly different approach with this one. I took the existing part and drilled a new hole in the back of it. This was tapped with an M5 thread as well as the new handle part and a small section of threaded rod used to join the two. This allowed me to make the handle longer without having to wait for the print and the old part is undoubtedly strong than the layered construction of the new handle shaft. All in all a good exercise in printing and modelling and waiting for the 3D printer to finish while laser cutting.


