Posts

Showing posts with the label mdf

Aperiodic Monotiles - Turtles

Image
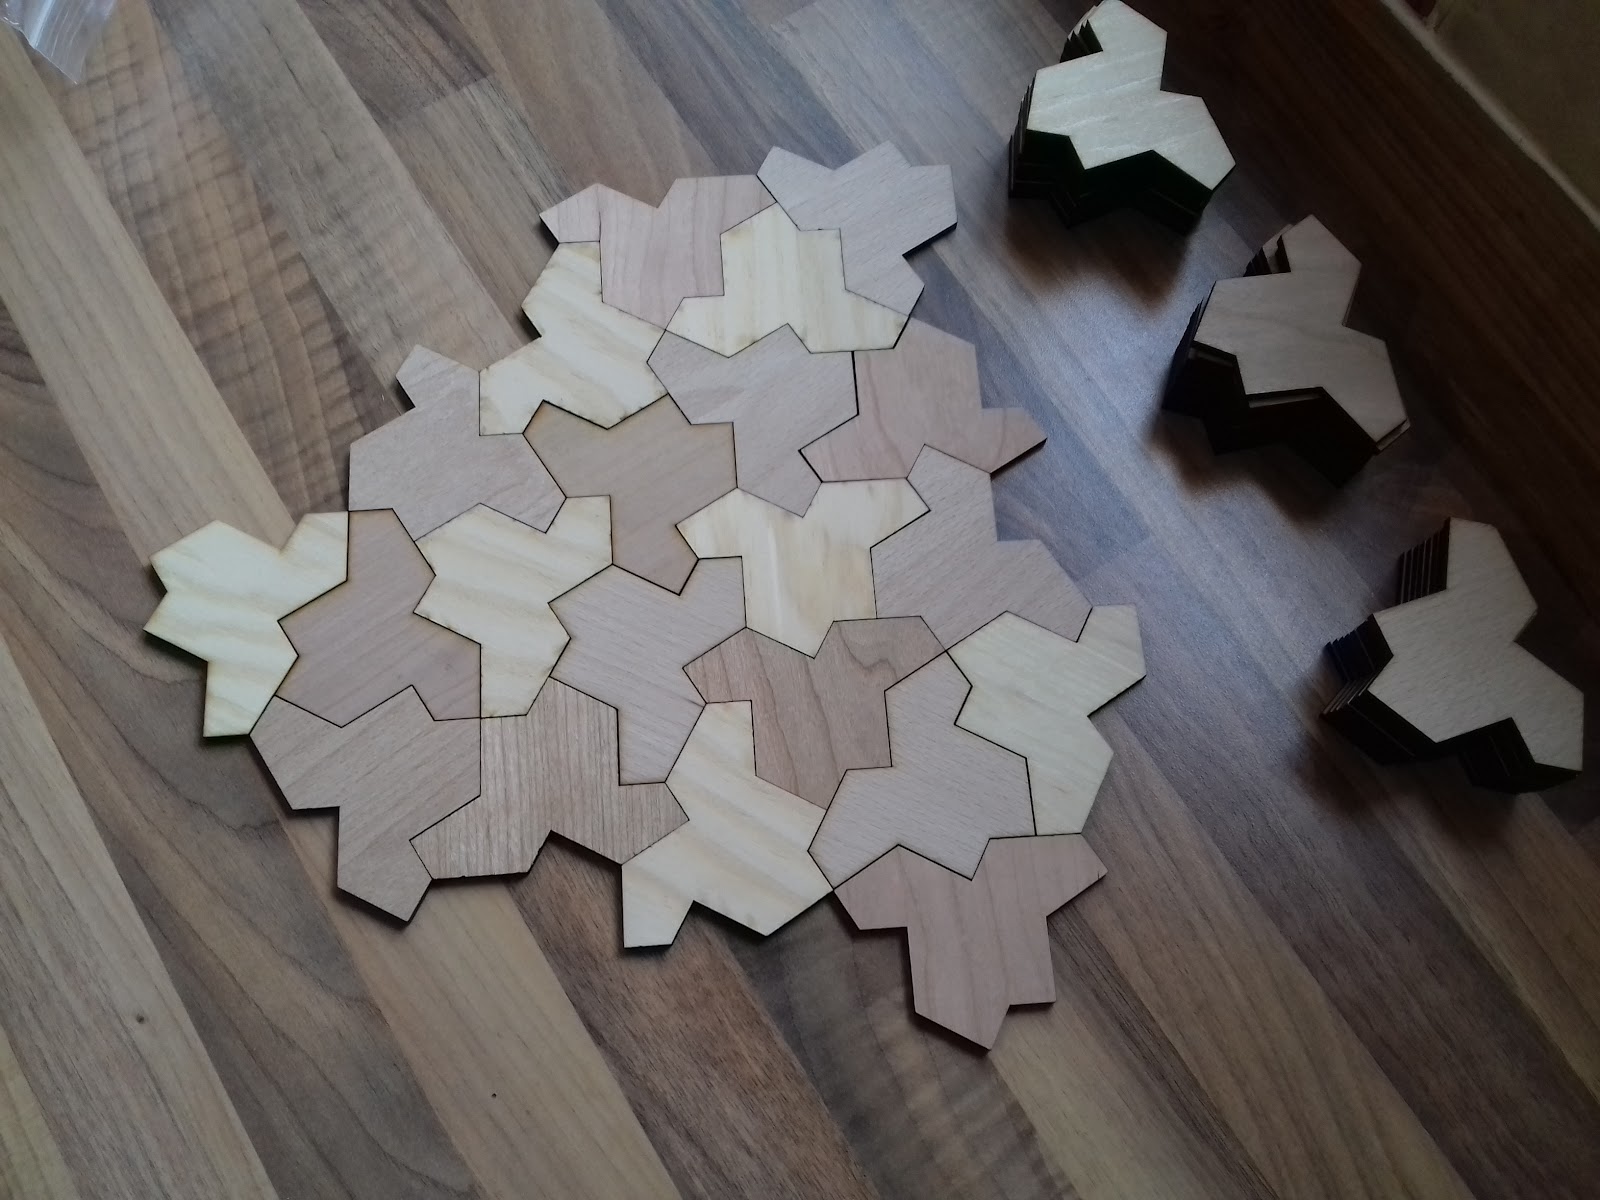
One of the cool things about the recent discovery of an aperiodic monotile, is that it's not just one tile. In fact it's a whole range of tiles, subtly different to each other. The two main shapes that have been taken from this are the 'Hat' as cut yesterday and the 'Turtle which I've cut today. I guess these two shapes have been adopted because they're easily made up from standard kites. Again I cut these in sheets with the grain in the same direction and used the gaps between the shapes to make kites ( svg here )  
Aperiodic Monotiles - Hat

Image
The discovery of a solution to the Einstein Problem  has caused a bit of a stir in the mathematical world this week. It's a shape that tiles the plane, but never repeats and while I don't entirely understand the implications or the mathematical proof of such a thing, I know a good looking tessellation when I see one so I set about making up a few. The first tile is known as the 'Hat' (although I think it looks much more like a T-shirt). The tile is made up from a number of different kite shapes so I also cut a few of those out as well. The full shapes are roughly 80mm across and 60mm wide and I cut them in three different flavours of wood veneered MDF, pine, beech and cherry (left overs from the Loki box ) I redrew my own sheet for cutting to ensure that all of the wood grains on all of the pieces align in the same direction and this is what gave me kites to fill in the gaps ( svg here )

Forced Perspective

Image
I spent some time looking into forced perspective drawings. I was trying to generate an effect where it looked as though a flat sheet of material was sloping downwards. There are plugins for inkscape that generate a perspective effect so the first step was to create some footplate artwork in a vector format (raster formats would also work in other programs like gimp). The original flat sheet was then warped to the second sloped sheet. I clearly should have made the second sheet shorter because the panels closest to the eye were actually stretched in length but the effect is still pretty prominent. 

Oled Numpad and Display

Image
This project is never going to see the light of day so I guess it doesn't hurt to show it here now. I was tasked with creating this code entry system for an escape room. You enter the code, the numbers appear on the screen and with the correct value an electromagnet box unlocks. I used the ESP8266 because its cheap, has easy mounting points, and can be remotely connected to for future expansion. The whole thing was driven from a small DC-DC so it had 12V and 5V at the same time. The keypad is a scanning matrix and the OLED is driven from the I2C, there is just enough IO on the Wemos D1 to meet all the requirements, but there had to be some juggling to use the TX/RX pins etc. It looks like the only image I have of the screen illuminated is from the prototype system, the oled had the perfect combination of brightness and readability.

Stone Tablet Prop

Image
Way back last year I was asked to make a broken stone tablet for an Empire  player event. The event happened this weekend so now I'm free to show the prop here. It's made from chunky 6mm mdf, the tablet was painted base grey and masked off with paper tape to reduce the burn marks from engraving. The letters are engraved and outlined to make them stand out against the grey. Finally the slab was marbled using different shades of white and grey colour. As a prop to be passed around at an event the reverse was also coloured and marbled to the same effect.

Panto Cake Number 2

Image
There was a second Panto cake I worked on with  Dawn  this year, she wanted a clock mechanism with hour and second hand. The hands were to rotate quickly to show that the hour had gone past midnight and a rotating cake, on one of my rotating platforms, would show a pumpkin turning into a carriage and back again. It would have been nice if the hands were in sync with the platform but time got the better of me and I settled for hands that worked. There was quite a bit of fettling to get one tube running smoothly inside the other, the gear mechanism was actually the easy part ( svg here )

Ley Line Crystal

Image
Not everything can or should be laser cut, but the laser can usually help you make the right tools for the things that can't. This ley line crystal is a perfect example. From Shadows asked if I could make a large crystal prop that represented the crossing point of several ley lines. I had a serious think about my options and almost completely forgot that I actually own a vacuum former  which is nearly perfect for this job. I could simply vacuum form two half shells of a large gem, paint them and stick them together to form a suitable prop. The vacuum former is a great tool for turning plastic sheets into fancy shapes but you need something to form over, if I could go down the shop and buy the right thing to form over I wouldn't need to be doing any of this at all, this is where the laser cutter comes into it's own. I found a suitable looking 3D model of a gem online, from there I used Pepakura  to unwrap the model into 2D flats with tabs in the appropriate pla...

Letterbox Lettering

Image
I believe these letters were destined to go a wedding reception and form part of a post box for well wishes. It's a simple mdf letter job but it becomes vaguely interesting when you send the cut out as well. This secures the letters for postage so you know they won't be damaged when they get to the other end but also it allows the letters to be spaced out perfectly when they get attached to the final item. Nothing says poor quality like not having the letters in a straight line.

Cake Rings

Image
So while my kickstarter was ticking over I had a fair amount of time to complete some other large projects. This one involved me making 35 sets of rotating cake rings, where a set includes one big ring and one small ring. These rings are going into Harry Potter cakes as per the video in the link. The trouble with ordering parts from China like this is that half of them were different. Many of the larger rings came with 3 mounting holes instead of 4 and none of the holes were drilled all the way through so I was unable to bolt them in place. I ended up drilling through the rings myself which was dull and time consuming. https://www.facebook.com/DinkydoodleDesigns/videos/1373384352766827/

Simple Boxes

Image
I was asked to put together a handful of simple box shapes which are going to be decorated and turned into war gaming terrain. I worked from a simple diagram and made as many boxes as possible from 4 sheets of 2mm mdf (600x900). The trick is making the finger joints mesh together to cut as efficiently as possible.

Flip Card Score Board

Image
Bit of a semi complete project this one but it was something quick I did this morning. A friend wanted a score card flip board, 5 rounds, scores 1-10. I knocked this set together and looped in some number cards quickly to show it functioning. The cards will ultimately be laminated and I don't have a laminator so it's been sent out with printed number sheets to be cut and laminated at the other end. Hopefully they'll do a better job with the hole punch than I have done here.

Faux Aircon units

Image
Given that the Null Sector comprised of 10x 20ft shipping containers, there was a fair bit of scope for making some larger props to go in the area. A quick flick through google images  shows various scenes of neon lighting and roofscapes adorned with pipework and units. I had the idea to make some faux aircon boxes to mount around the camp. As you can see some of these units crept into the back of shots and proved to be quite useful to cover up the name plates on the sides of the containers.  Image by Sophie Garrett The basic box shapes were made from 6mm MDF straight from B&Q, I spent a good 20 mins their annoying everybody else who wanted sheets cutting down to size but it's generally easier to pay a bit more money per sheet and have someone else cut it down into chunks that A) Can be assembled immediately and B) fit in your car. Some additional holes were cut on the laser cutter, it's a bit sticky as materials go but if you need a tri pronged hole quick...

Demonic Seals

Image
These demonic seals were cut in ye olde MDF for that genuinely realistic appeal. The disks were painted with metallic acrylic before engraving so it was easy to wipe the dust off. These seals were going to be used as decoration on the vale machine (and were made way back in May)