Posts

Showing posts with the label veneer

Aperiodic Monotiles - Turtles

Image
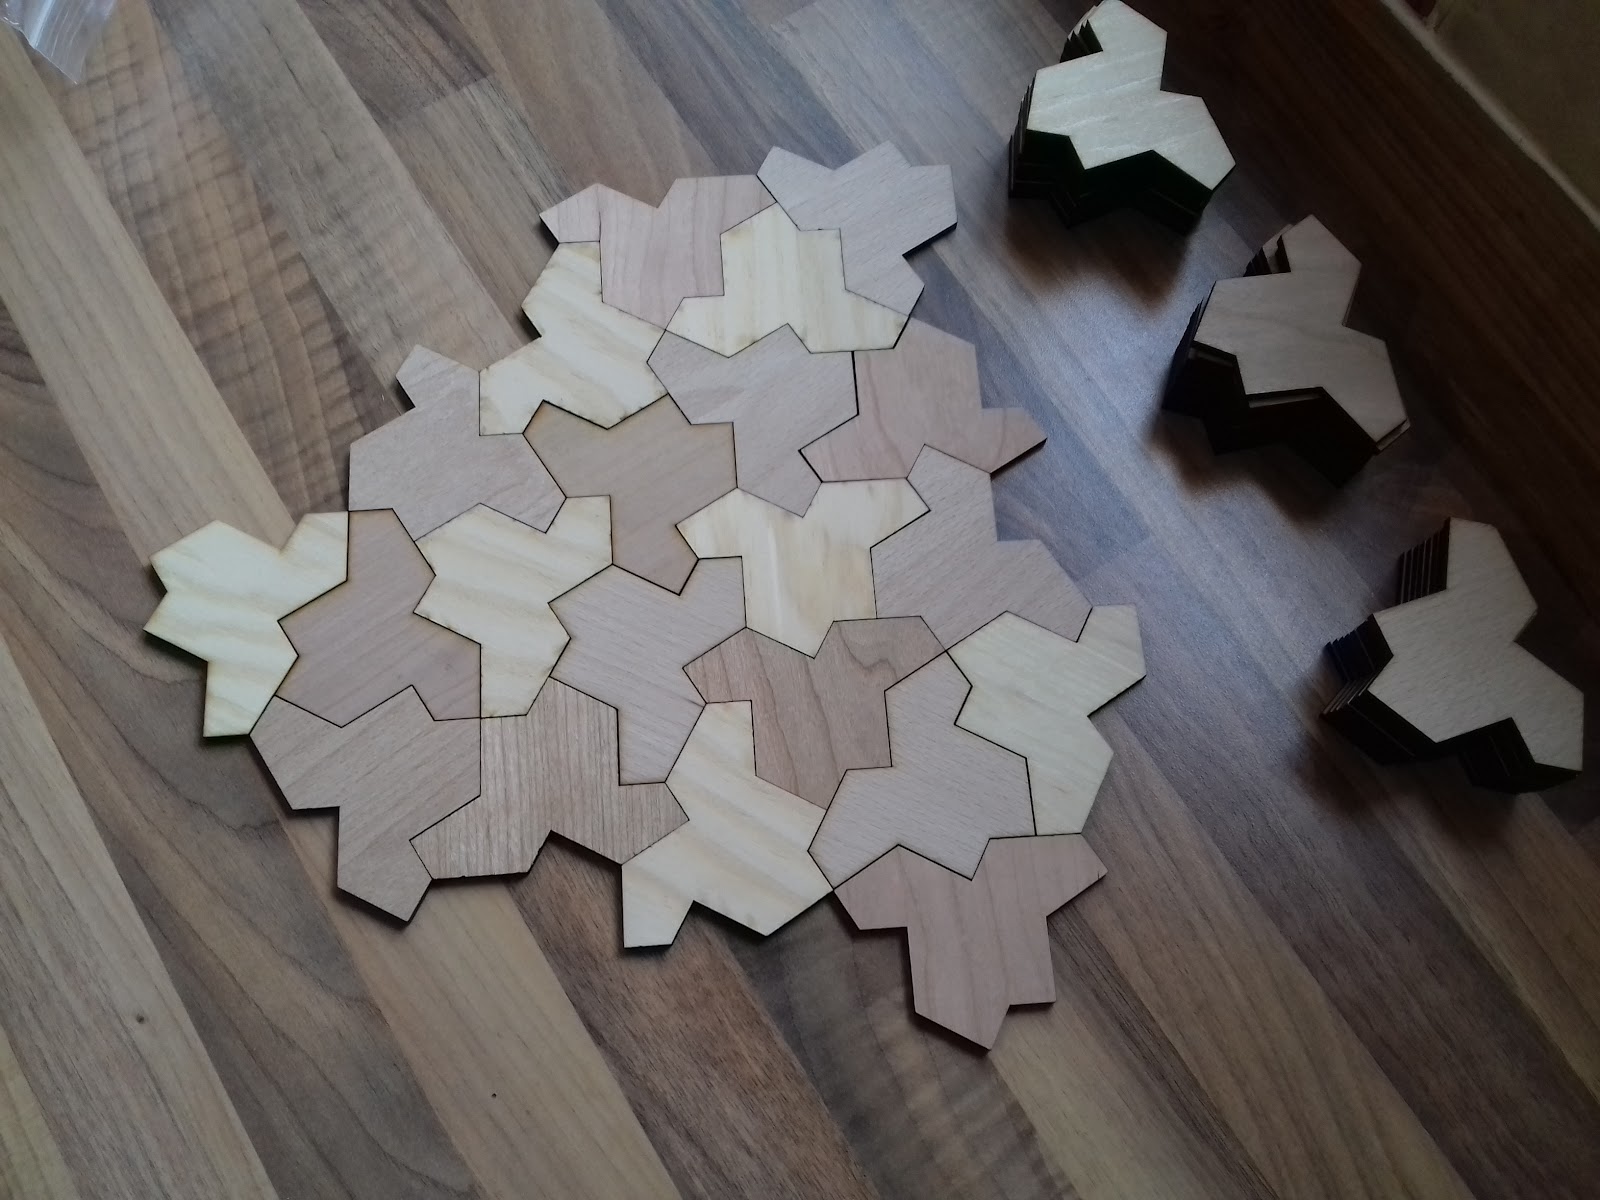
One of the cool things about the recent discovery of an aperiodic monotile, is that it's not just one tile. In fact it's a whole range of tiles, subtly different to each other. The two main shapes that have been taken from this are the 'Hat' as cut yesterday and the 'Turtle which I've cut today. I guess these two shapes have been adopted because they're easily made up from standard kites. Again I cut these in sheets with the grain in the same direction and used the gaps between the shapes to make kites ( svg here )  
Aperiodic Monotiles - Hat

Image
The discovery of a solution to the Einstein Problem  has caused a bit of a stir in the mathematical world this week. It's a shape that tiles the plane, but never repeats and while I don't entirely understand the implications or the mathematical proof of such a thing, I know a good looking tessellation when I see one so I set about making up a few. The first tile is known as the 'Hat' (although I think it looks much more like a T-shirt). The tile is made up from a number of different kite shapes so I also cut a few of those out as well. The full shapes are roughly 80mm across and 60mm wide and I cut them in three different flavours of wood veneered MDF, pine, beech and cherry (left overs from the Loki box ) I redrew my own sheet for cutting to ensure that all of the wood grains on all of the pieces align in the same direction and this is what gave me kites to fill in the gaps ( svg here )

Curved Lid Box

Image
The curved lid that I vacuum glued veneer over was used to make this box. It was made quickly to look like a wooden chest but it was never intended to be functional. The side panel is made from a single section so that it always stays open and the lid can't close. The whole thing was skinned in a wood veneer to make it the same colour as the lid and some metallic card was wrapped around the box to look like bindings. Inside the box is a scroll of paper that is used to display 'mystical' numbers. I will write about that project as soon as I get it back but for now I'm missing photos of the hardware.

Gluing curved surfaces

Image
I wanted to make a curve lid for a classic pirate style treasure chest, I didn't really consider it before making and before I knew it I had stacked dozens of pieces of 6mm ply into a pile to give me the right shape. It doesn't leave a very nice edge though so I decided to skin it with a piece of flexible wood veneer . I started by gluing the veneer along one edge of the curve but I didn't have enough clamps to hold it in place across the whole surface. The solution is to vacuum seal the whole thing in a ziplock bag. It's a very simple process where I sucked the air out of the back once the curve had been glued and this provided suitable pressure to hold the veneer in place until the glue had dried. I use evo stick wood glue with resin  that grips the material in about 5 minutes. After that point you can remove the item from the bag and it will dry properly over the next 24 hours. I didn't take any specific pictures of the lid but I'll have some images of t...

DIY Heng Lamp

Image
I was quite taken by this Heng Balance lamp I saw on kickstarter so I decided to make myself one. I wrote an instructable about the process and sharing the files. It's pretty straight forward and now it sits happily on my wife's desk.

Coaster

Image
I was inspired by some end grain chopping boards I saw on you tube to try and recreate some of the techniques with the laser cutter. This coaster was made by cutting the basic outline with the laser and then cutting across it with the ribbon pattern. The cut was made in two lines removing a chunk 0.8mm wide, a single layer of veneer was inserted into the gap and then the coaster was glue shut again. The second set of ribbons (overlapping the first) were cut once the glue had dried. The second line of veneer was inserted and the whole thing sanded up to a nice finish. ( svg here ).

Oak Veneered MDF Rings

Image
I also cut some rings for Sam at the same time as the perspex. These were cut from oak veneered mdf , like all mdf it creates a lot of smoke when it cuts and that can stain the surface. Masking it is still one possible solution but at least with veneers you can sand them smooth and clean again. Sam also needed some claps for necklaces so we squeezed those into the material too, it's a very clever laser cut solution and we all know everything should be lasered if at all possible.

Bobby Cat, Trinkety Mascot

Image
Steph is still drawing up some amazing artwork that inspires me to make pretty lasery things. She now has a Patreon account  where you can support her artistic efforts. While I was looking over there I noticed this amazing kitty picture which was just crying out to be converted to wood veneers. He is called Bobby and he's a bit of a mascot (you'll notice him illustrating the $30 reward). I wanted to do it justice so I filled all the gaps and sanded/varnished it properly. It still needs a lot more elbow grease but it's looking lovely already.

Kitronik Veneered MDF

Image
While cutting Sams new oak leaf design I decided it would be worth trying on Kitronik's Oak veneered MDF material . Real wood veneers are really nice to cut and these designs look great in real wood.

First place trophy

Image
Here is the first place trophy for the war gaming competition. The trophies were all handed out yesterday which means I can show this today. I outsold myself, stretched the budget and spent a lot of time making a trophy as good as I could. The wings are made from wood veneers and are a remake of a previous item . The laurel wreath was redone with each leaf as a separate piece of 0.8mm ply. The wooden spoon was bought from the shop. The rounded base is a variation on my useless machine  and the plaque made from silver/black engraving laminate. The ribbon across the middle is two layers and engraved onto 1.5mm walnut.  

Glowforge glowy thing

Image
The Glowforge laser cutter is currently crowdfunding itself over in America. It looks like a good piece of kit and I'm particularly interested in the autofocusing Z axis so I signed up fairly early on. There is a section in the forums about things you'd make on the machine, I feel wood veneers are massively neglected for these low power machines so I made this nice sampler to demonstrate what can be done. This box is made from Poplar ply, with a Walnut veneer on the front. The lettering is made from Bamboo veneer, the whole thing was sanded and oiled to finish it off nicely. Here is my referral link if you want to get yourself an extra $100 off the price of a Glowforge laser.

Winged Heart Remake

Image
I very long time ago I made this winged heart using stacked veneers (can't believe it was 2.5 years ago). It's been to most maker faires with me and it's received a lot of love but I was finally asked to remake it at the recent Halifax Mini Maker Faire. With all remakes I took the opportunity to make some improvement, most of the feathers are now stuck on the backboard which made it easier to assemble and the heart is now made flat because the stacked veneers were too awkward last time. I'm also sharing the files this time around. ( svg here )

Laser Cutting Samples

Image
Terry from Occasions Boxed  contacted us at Just Add Sharks  asking if we could do a sample to demonstrate the capabilities of the Laser cutter. He sent me a well coloured raster image which left me scratching my head a bit. I little bit of creativity later and I came up with the above, he obviously liked it because he purchased a Blacknose over the weekend and I delivered and installed it on Monday

Say it with wooden flowers

Image
I've been married for 7 years this week and I wanted to make something nice for my very understanding wife. I've had this layered veneer rose planned for some time and I'm pleased with the way it came out. The veneers warped quite badly once glued so you definitely need to have the clamps handy during assembly. If I were making it again I would have bigger overlaps to make it easier ( svg here )  

Christmas Badge 6

Image
I saved the best for last. I'm really pleased with the stripey candy effect and the blue ribbon.

Christmas Badge 5

Image
Another 1 from the trio , I learnt my lesson and simplified this a little. The nose is still 1.5mm wide so it is in danger of being lost. The blue wood veneer is great.

Christmas Badge 4

Image
This is the same tree from the Christmas Trio but obviously much smaller. Too small in fact, the dots are 2mm wide and the strips are 1.5mm wide. It's a nice badge but I don't want to make more than one.

Christmas Badge 3

Image
There is a small etch all round the edge of these holly leaves. It make a big difference to the final piece but it did increase the cutting time from seconds to 2 minutes, worth it though.

Christmas badge 2

Image
Not entirely happy with the alignment of these veneers, they slipped while gluing but also not very happy with the overal design so will abandon this one here. 

Christmas Badge 1

Image
I've been working on some Christmas brooches for a craft faire I'm going to this week. Feels a bit like working on project 365 again. This robin, and these items, are made from a poplar ply backing and covered in layered wood veneers to give it some depth.