Switching Game Modes
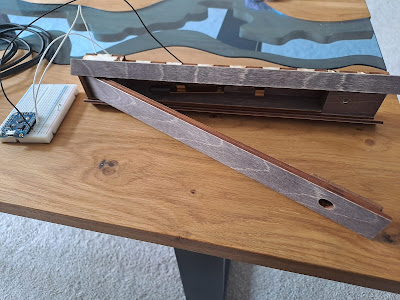
The main purpose of this game is to subconsciously show the player that the box is now empty, once they have removed the radiator key from inside it. It also doubles as a handy on/off switch for the game. I could have hardwired the power to go through this switch but there are better things that can be done. If the power comes on at the start of the game then we can time how long it takes the player to solve the whole game.
The other neat thing is one of my design philosophies for this box. I wanted this whole game to have as little reset required as possible. If the up position was 'off' and the down position was 'on', the player would pull the switch down but somebody else would have to come and flip the switch up again to reset the game. The player instinctively knows they have to flip the switch to turn the box on and they don't care what direction it has to go, so at the start of the game I simply check the position of the switch and the puzzle is complete when the player flips it to the other position. This means there is zero reset required for this part. Now onto some code.
The knife switch is actually two normal digital input but we want to interpret those values in a way that's easy to understand so the first step is to define the three different states of the knife switch; Up, Down and Floating (when neither side is connected). These states have actual values when compared to the digital inputs so the numbers are also defined. We have some variables to record the states of the input during the game and lastly we have a function that interprets the input values and converts them to the knife switch state. This is done by converting the digital inputs to binary bits and merging them into a single value.
In the previous example we introduced the idea of controlling a game amongst the inputs and outputs. It's time to expand upon that and now we want to control several different 'puzzles' as part of the whole game and we want to access them all in the same way so it's time to define what these puzzles should be. A puzzle function should accept a value to indicate if this is the first time it's being called, so it can do additional set up actions, and it should return a value to indicate if the puzzle has been successfully completed.
If we can keep all of the puzzles within this framework we can easily progress from one game to the next during play and quickly change the puzzle order around during development. For the first time we're starting to use the Serial functions to provide feedback about the game state to the Arduino Serial Monitor. This tool, provided as part of the Arduino IDE, provides a quick way to view text data being sent from the controller, in this case it's particularly handy to see which puzzle the player is attempting to solve and ultimately what state the puzzle is in.
Here is the entire knife switch puzzle defined in it's own function. When the function is first called it records the starting position of the knife switch. Whenever the position of the switch changes it reports the new value back to the serial monitor and it waits for the switch to be flipped over to the other position before it returns a successful value to the main loop of the program.
This brings us round to the main lesson from today's tutorial, we have multiple defined puzzle functions that accept the same input and return the same values. How do we switch between them in the controlling code? The answer is in 'function pointers', we can collate a list of all the different puzzle functions and access them as required, because they all behave the same externally the controlling code won't even know or care which puzzle is actually being played.
The first step is to define what kind of function we're pointing to and we do this with the 'typedef' statement which creates an alias for our function pointer making the code easier to read in all future references. A 'puzzleFunction' can be any function that accepts a boolean value and also returns a boolean value. Next we can create an array of all the different puzzles that are used in the game, for this example it's just the knife switch puzzle and a blank puzzle. We can even calculate automatically how many puzzles are in the array. When it comes time to switch puzzle, we just move to the next puzzle in the array and call that one instead. Changing the order of puzzles and increasing/decreasing the number of puzzles is now entirely controlled by the items within the array which is very flexible.
The other significant change that you'll find in the code for this tutorial is that all the different parts of controlling the lights and the IO have been split off into their own files. This makes the code much easier to read and each section easier to locate.
The full code for this can be found on my github repository
https://github.com/msraynsford/Puzzling/


